Creating your own custom Page Types is very easy to do BUT when you need some additional funtionality out of it, sometimes it's a bit harder and you can't always find what you're looking for in the documentation. What I'll demonstrate here is an alternative way to add Attachments to your Page Type and then display those attachments in your transformation.
Kentico offers so many ways to do similar things which is great, although some of the more beneficial items aren't very well known or easy to find. What I'm going to share with you is how I enhance the content editor's experience within Kentico simply by adding an Attachments field to a page type. I know what you're thinking, "Why would I use this when I can use Attachments page on the Properties tab?". Well, here's my reasoning:
Reason #1: (and most important): it gives the content editor a page to enter content on vs. having to remember after adding the content to go to the pages Attachments tab.
Reason #2: it's specific for that page or content block. Not all pages in the content tree are actual pages and if I want to tie some documents or images to a block of content vs. a page, I can easily do so by using the attachments form control in my page type.
Add the new field to your page type
I have a page type that I call vehicles. It will allow me to gather car and truck information and display it in a simple layout. The requirement was the vehicle can have zero or many images. We'll add a new field with the following attributes:
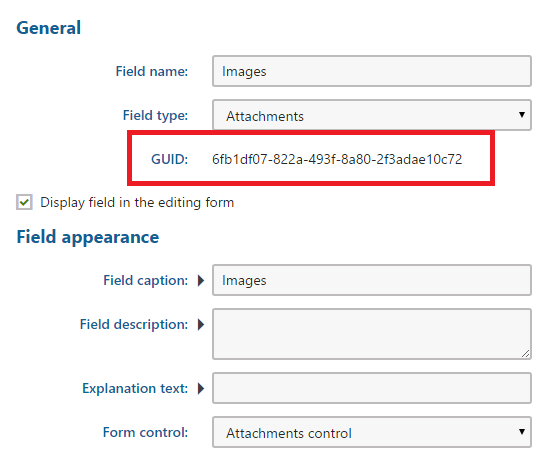
Take note of the GUID field and the value after you save it. I'll share more about this later.
Create the Transformation
Navigate to the page type's transformation. Create a new transformation and in there we'll add the code below which will get the needed data to properly bind the control to the attached images.
<%@ Register Src="~/CMSModules/Content/Controls/Attachments/DocumentAttachments/DocumentAttachments.ascx" TagName="DocumentAttachments" TagPrefix="cms" %>


<script runat="server">
  protected override void OnInit(EventArgs e)
  {
    CMS.DataEngine.DataClassInfo dci = CMS.DataEngine.DataClassInfoProvider.GetDataClassInfo(Eval("ClassName").ToString(), true);
    if (dci != null)
    {
      CMS.FormEngine.FormInfo fi = new CMS.FormEngine.FormInfo(dci.ClassFormDefinition);
      // field name we added in the page type
      CMS.FormEngine.FormFieldInfo ffi = fi.GetFormField("Images");
      Guid AttachmentGroupGUID = ffi.Guid;
      ucDocAttachments.Path = Eval<string>("NodeAliasPath");
      ucDocAttachments.AttachmentGroupGUID = AttachmentGroupGUID;
      ucDocAttachments.TransformationName = "CMS.Root.DocumentAttachments";
      ucDocAttachments.ReloadData(true);
    }
  }
</script>
Here's a brief on the code above which should be the first code block in your transformation. First we'll register the user control for the attachments. Secondly, we want to get the DataClassInfo based on the page type's ClassName, this will allow us to dynamically get the GUID of the Images field for the page type. Do you remember the GUID from the image above outlined in red? The GUID is stored in the DataClassInfo definition and is what you see in the image above.
So you you ask, why not just copy and paste that code in for the AttachmentGroupGUID for the attachments control? My answer is YOU CAN! I choose NOT to because I typically reuse transformation for multiple page types. Plus you're hard coding the GUID, not my favorite thing to do. Here you can see the actual XML definition in the CMS_Class table for the Images field in the page type. See the attrubute for the GUID in the first line of the XML below?
<field column="Images" visible="true" columntype="docattachments" fieldtype="CustomUserControl" allowempty="true" columnsize="200" columnprecision="0" publicfield="false" guid="6fb1df07-822a-493f-8a80-2f3adae10c72" reftype="Required">
        <properties>
            <fieldcaption>Images</fieldcaption>
        </properties>
        <settings>
            <Extensions>inherit</Extensions>
            <Autoresize_Hashtable>True</Autoresize_Hashtable>
            <Allowed_Extensions>pdf;doc;docx;ppt;pptx;xls;xlsx;htm;html;xml;bmp;gif;jpg;jpeg;png;wav;wma;wmv;mp3;mp4;mpg;mpeg;mov;avi;swf;rar;zip;txt;rtf</Allowed_Extensions>
            <ChangeOrder>True</ChangeOrder>
            <controlname>documentattachmentscontrol</controlname>
            <Paging>True</Paging>
        </settings>
    </field>
So now that we've defined how everything works, add the rest of the HTML below to the transformation:
<div class="vehicle">
  <div class="vehicleDescription">  <%# Eval("VehicleType") %></div>
  <div class="lineItem"> <span class="lineDescription">Description:</span> <%# Eval("Description") %>.<br /> </div>
  <div class="lineItem"> <span class="lineDescription">Mileage:</span> <%# Eval("Mileage") %> miles<br /> </div>
  <br/>
  <%# GetAttachmentIcon("AttachmentGUID") %>
<a class="vehiclePhoto" target="_blank" href="<%# GetAbsoluteUrl(GetAttachmentUrl(Eval("AttachmentName"), Eval("NodeAliasPath")), EvalInteger("AttachmentSiteID")) %>">
<%# Eval("AttachmentName",true) %>
  <cms:DocumentAttachments ID="ucDocAttachments" runat="server" /></a>
</div>
Now add a new page to your content tree. Add the attachments using the Attachments control:
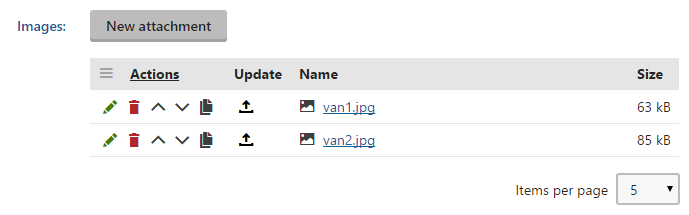
Save it and below is the end result, pretty simple design but it works!

And there you have it!
With this little modification
you allow the content editor to add images/attachments in one place without having to click around multiple places.
Best of luck and Happy Coding!